
Set up a domain and HTTPS
Give your Dew server the address people will use to open it, such as files.example.com, and get a trusted certificate for HTTPS. The domain wizard walks you through it and checks each step before you continue.
Before you start
Section titled “Before you start”- A domain or subdomain you own, and access to its DNS settings.
- One of these, depending on how people will reach Dew:
- Directly: your router or firewall forwards public TCP port 443 to this server. On a Synology NAS, forward it to port 8843.
- Through a reverse proxy or tunnel: access to your proxy’s settings, so you can forward your address to Dew. See Run Dew behind a reverse proxy.
1. Open the domain wizard
Section titled “1. Open the domain wizard”Right after you create your admin account, click Set up domain. Otherwise, go to Settings → Domains and click Add domain.
The wizard shows its steps at the top: Connection, Address, then DNS and HTTPS, or Proxy if you use a proxy.
2. Choose how users reach this server
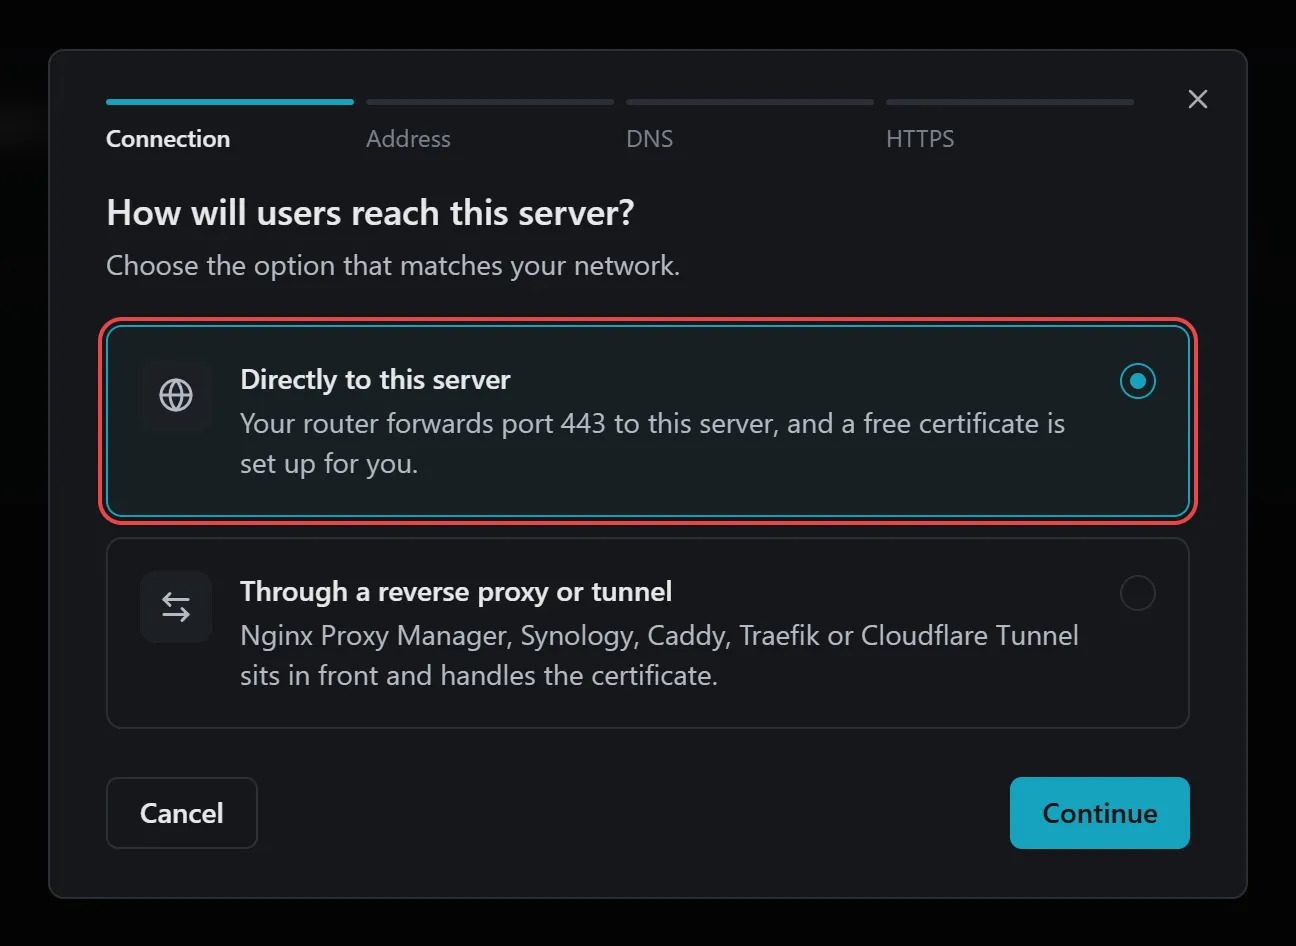
Section titled “2. Choose how users reach this server”Under How will users reach this server?, choose one:
- Directly to this server: your router forwards port 443 to this server, and Dew gets a free certificate for you.
- Through a reverse proxy or tunnel: a proxy such as Nginx Proxy Manager, Synology, Caddy, Traefik or Cloudflare Tunnel sits in front of Dew and handles the certificate.
If Dew finds a proxy in front of it, Through a reverse proxy or tunnel is already selected and marked Detected.
Click Continue.
3. Enter the address
Section titled “3. Enter the address”- In Address, enter the address without
https://, for examplefiles.example.com. - If this isn’t your first domain, turn on Make this the primary domain to make it the main address of your server.
- Click Continue.
Dew saves the address. If you leave the wizard now, you can finish later: go to Settings → Domains, click Add domain and enter the same address. The wizard picks up where you left off.
If you chose a proxy, go to Connect your proxy.
4. Point the address to this server
Section titled “4. Point the address to this server”The wizard shows Point files.example.com to this server and the DNS record to add:
| Type | Name | Value |
|---|---|---|
| A | files |
your server’s public IP address |
Dew fills in the name and your public IP address, with a copy button next to each. If Dew can’t find your public IP address, your router or internet provider shows it.
- Add the record where you manage DNS for your domain. Some providers call Name “Host”. On Cloudflare, set Proxy status to DNS only.
- Back in the wizard, click Check now.
Dew checks two things: Looking up files.example.com and Reaching this server on port 443. When both show a check mark, click Continue.
If a check fails, Dew checks again every 30 seconds. New DNS records usually appear within minutes. If this server is only on an internal network and the check can’t pass, click Continue anyway.
5. Get a trusted certificate
Section titled “5. Get a trusted certificate”The wizard shows Get a trusted certificate and offers a free certificate from Let’s Encrypt that renews automatically. If a renewal fails, Dew alerts you.
- Click Get certificate.
- Wait while Dew requests the certificate, installs it, and checks that browsers trust it.
When it’s done, the last check shows Browsers trust it. and the wizard moves on.
To use a certificate you already have, click Use an existing certificate instead. Upload the certificate and private key files, or click Paste them instead. If the server already has other certificates, you can also click Use one already on this server. Then click Install certificate.
6. Finish
Section titled “6. Finish”The wizard shows files.example.com is ready. Click Go to files.example.com to open Dew at its new address. You stay signed in. If Done shows instead, click it.
Open https://files.example.com in your browser: Dew opens with no certificate warning.
Continue with Set up email.
Connect your proxy
Section titled “Connect your proxy”If you chose Through a reverse proxy or tunnel, the wizard shows Connect your proxy after the address.
- In your proxy, forward your address to this server over HTTPS, on the port Docker publishes for Dew (443 unless you changed it, or 8843 on Synology).
- If your proxy has a setting to verify the backend certificate, turn it off for this server. Your proxy keeps its own certificate.
- In the wizard, click Check now.
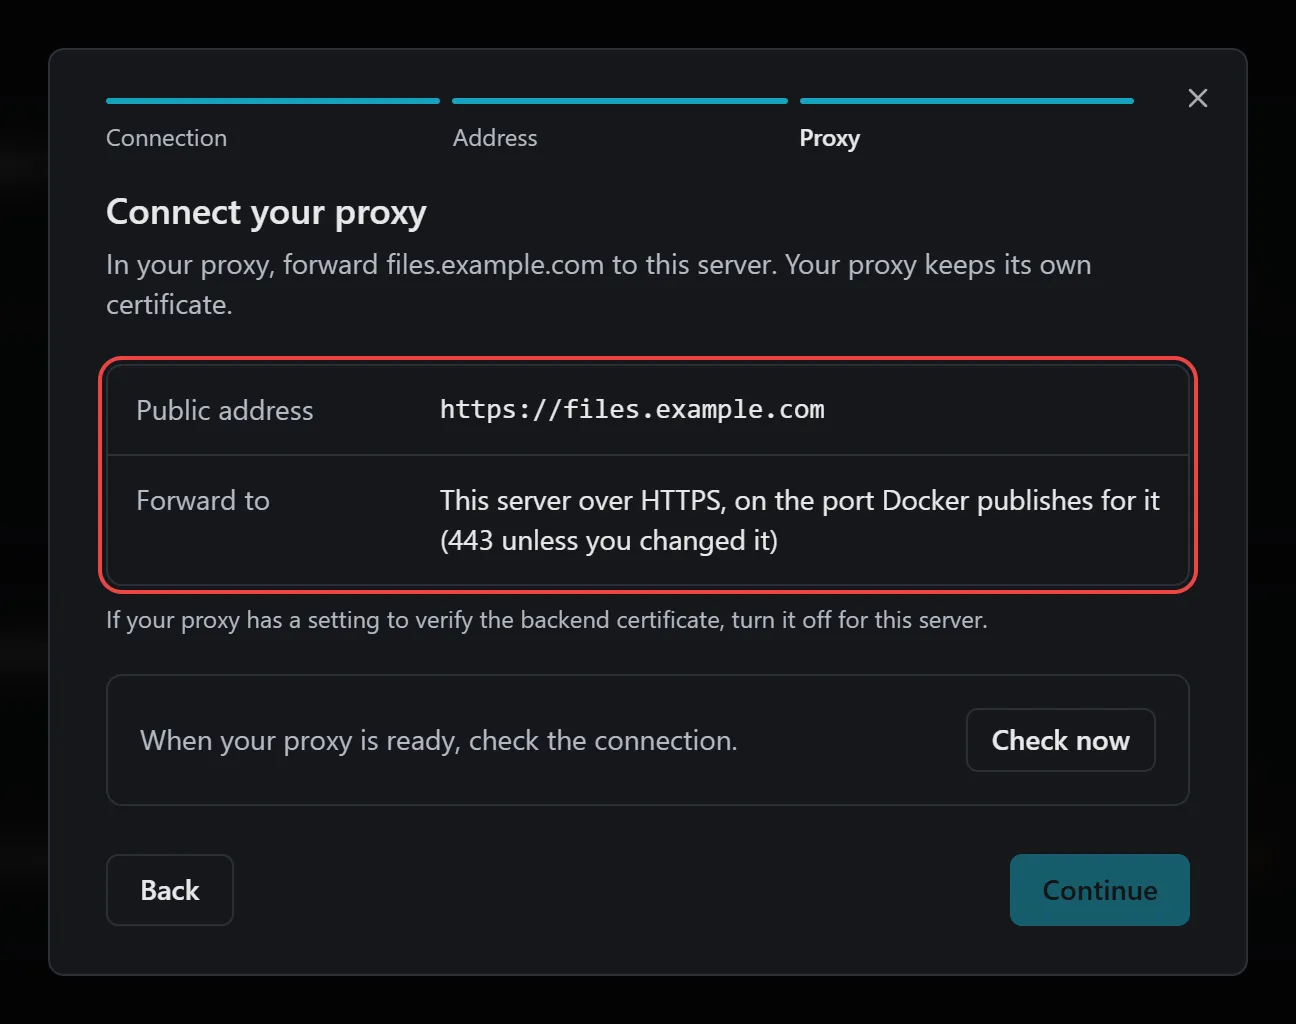
Dew checks Looking up files.example.com, Reaching this server through your proxy and Checking the certificate. When they pass, click Continue, then finish as in step 6.
For proxy settings that keep uploads fast and visitors’ addresses correct, see Run Dew behind a reverse proxy.
Replace a certificate later
Section titled “Replace a certificate later”To change the certificate of a domain, go to Settings → Domains and click Manage certificate on its row.
If browsers don’t trust a certificate you installed, Dew shows The new certificate is installed, but browsers don't trust it. The previous one can be restored. Click Restore previous certificate to go back, or Keep the new one. A new Let’s Encrypt certificate that browsers don’t trust is replaced with the previous one automatically.
On the Free plan
Section titled “On the Free plan”The Free plan allows one active domain. When you add another, the wizard shows Your plan allows one active domain. This one is saved as inactive, and you can switch to it with Set primary. To switch, go to Settings → Domains and choose Set primary on that domain. Unlimited domains are part of the Pro plan.
If something goes wrong
Section titled “If something goes wrong”| What you see | What to do |
|---|---|
No record found yet. New records can take a while to appear. |
The DNS record isn’t visible yet. Check that you added it for the right name, then wait. Dew checks again every 30 seconds. |
Nothing answered on port 443. Check that your router forwards port 443 to this server. |
Forward public TCP port 443 on your router to this server (port 8843 on Synology), and check that the record’s value is your public IP address. |
The check timed out. Try again in a moment. |
Click Check now again. If it keeps happening, check your router’s port forwarding and firewall. |
Let's Encrypt needs this server on port 443 from the internet. It's set up for port 8443. |
DEW_PUBLIC_HTTPS_PORT is set to another port in compose.yaml. If people reach Dew on port 443, remove that line or set it to 443, then run docker compose up -d. Otherwise, use your own certificate. |
This server couldn't confirm that files.example.com reaches it. Let's Encrypt allows 5 failed attempts per hour, so check your DNS record and port forwarding first. |
You continued without a passing DNS check. Go Back, fix the record or port forwarding, and click Check now before you request a certificate. |
Let's Encrypt couldn't issue a certificate. Check that files.example.com points to this server and that port 443 is open to the internet. |
Check the DNS record and port forwarding, then click Try again. Click Details to see Let’s Encrypt’s reason. |
This server couldn't reach files.example.com to check it. Open https://files.example.com from outside your network to confirm it works. |
Your router may not let devices inside your network reach your public address. Open the address from a phone on mobile data, or another network outside yours. If Dew opens there, click Finish anyway. |
Browsers don't trust the certificate's issuer, or its chain is incomplete. |
Your certificate file is missing its intermediate certificates. Get the full chain from your certificate provider and install it again. |
The certificate is for a different address. |
Install a certificate that covers your domain’s address. |
Your proxy didn't pass the request on. Check that it forwards files.example.com to this server over HTTPS. |
Check your proxy’s settings for this address, then click Check again. |
files.example.com is set up with It isn't verified yet. Choose Verify on Domains once it's reachable. |
Fix the DNS record or port forwarding, then go to Settings → Domains and choose Verify on the domain. |
| needs attention next to a certificate on Settings → Domains | Click the certificate status to open its details. Renewal Problem shows why the renewal failed; fix it, then click Retry renewal. |
For more detail, open System → System → Error logs in Dew. Each error has a reference such as REF-a3f8b2c1 that you can quote when you contact support at support@getdew.io.